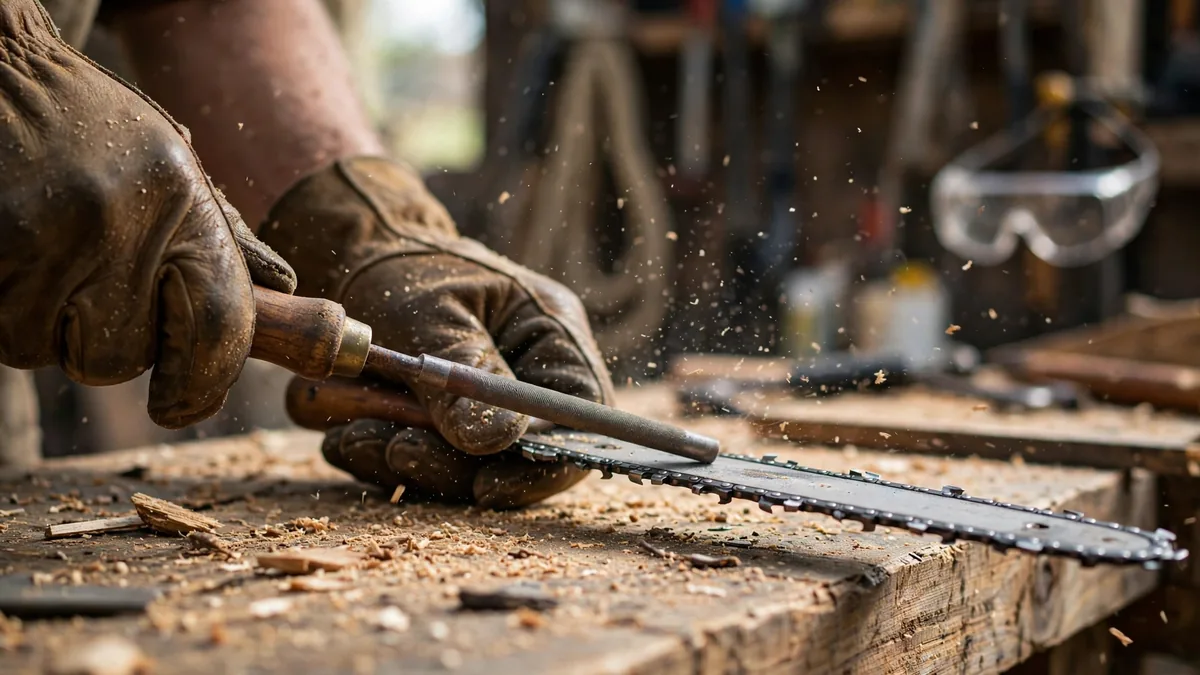
How to Sharpen a Chainsaw: A Complete Step-by-Step Guide
A dull chainsaw chain is slow, frustrating, and genuinely dangerous. If you own a chainsaw in Australia — for firewood, storm cleanup, or weekend property work — learning how to sharpen a chainsaw by hand is one of the most useful skills you can pick up. It costs almost nothing, takes about ten minutes once you've practised, and keeps your saw cutting the way it was designed to.
This guide covers the tools, the correct filing angles, a step-by-step sequence, and how to know when it's time to stop sharpening and replace the chain.
Signs Your Chainsaw Chain Is Dull
Chainsaw chains dull gradually, so poor performance creeps up on you. Before you start, confirm sharpening is the fix. STIHL's sharpening guidance lists these telltale signs:
- You have to push. A sharp chain pulls itself into the wood with very little pressure. If you're leaning on the saw, the chain is blunt.
- Fine dust instead of chips. Sharp cutters throw off coarse chips. A dull chain grinds out fine sawdust.
- Smoke from the cut. If the cut smokes despite correct chain lubrication and tension, friction is doing the cutting — the teeth aren't.
- The saw wanders. A dull chain cuts crooked, pulling to one side. This can also mean the teeth on one side are longer — filing will fix it.
- Chattering and bouncing. The saw feels rough and vibrates as it cuts instead of running smoothly through the timber.
Sharpening little and often beats waiting until the chain is completely blunt.
Safety Gear and Setup First
A chainsaw chain is a string of razor blades. Before touching it:
- Put on heavy-duty work gloves and safety glasses — metal filings fly when you file.
- Disconnect the power. Remove the battery from a cordless saw, unplug an electric saw, or remove the spark plug cap on a petrol saw. Engage the chain brake while setting up, then release it so the chain can move freely.
- Secure the saw. Clamp the guide bar in a bench vice, or a stump vice in the paddock — the bar must be level and the saw must not move while you file.
- Tension the chain slightly tighter than your normal working setting so it seats firmly in the bar while you file.
For the full rundown of workshop PPE and safe habits, see our workshop safety guide for 2026.
Tools You Need to Sharpen a Chainsaw
You don't need a workshop full of gear. Here's the complete kit:
- Round saw-chain file, correctly sized — not a regular workshop file, which has a different surface structure and will chew the cutters rather than sharpen them.
- File guide or file holder — holds the file at the right depth and carries the angle markings. The single best investment for a beginner.
- Flat file — for lowering the depth gauges (rakers).
- Depth-gauge tool — a small template that shows exactly how far each raker sits above the correct height.
- Bench vice or stump vice — to lock the bar still.
- Felt-tip marker — to mark your starting tooth.
- Work gloves and safety glasses — non-negotiable.
Optional but handy: a soft brush to clean the chain first, and a 2-in-1 filing tool that sharpens the cutter and resets the depth gauge in one operation.
Choosing the Right Round File
This is where most beginners go wrong. The round file diameter must match your chain's pitch — the wrong size reshapes the cutter incorrectly and reduces cutting performance. STIHL's official guidance is explicit: ordinary workshop files are unsuitable for saw chains.
The pitch is usually stamped as a number or code on the depth gauge. If it's worn off, check your saw's manual or the chain's original packaging. Here's STIHL's published conversion table:
| Marking on depth gauge | Chain pitch | Round file diameter |
|---|---|---|
| 7 or 1/4" Picco | 1/4" Picco | 3.2 mm |
| 6, P or PM | 3/8" Picco | 4.0 mm |
| 1 | 1/4" | 4.0 mm |
| 2 or 325 | .325" | 4.8 mm (3/16") |
| 3 | 3/8" | 5.2 mm (13/64") |
| 4 | .404" | 5.5 mm (7/32") |
Oregon prints a similar filing chart on every file package (common sizes 5/32" / 3/16" / 7/32", matched to the chain code). When in doubt, check your chain's packaging or owner's manual rather than guessing.
Filing Angles and Depth Gauges Explained
Every cutter is sharpened at a specific angle, and knowing the terms makes the job feel less like guesswork.
Top-plate (filing) angle. The angle you hold the file relative to the guide bar — the one your file guide's markings show. STIHL's published guidance is that its saw chains are generally filed to around 30°; Oregon's filing charts list 30° or 35° depending on the chain. The rule: use the angle printed on your chain's packaging. If you've lost it, 30° is the widely published default — but confirm with your dealer rather than filing blind.
Depth gauges (rakers). The fin-shaped links between the cutters control how deep each cutter bites. The depth-gauge setting — the distance between the top of the cutter and the top of the raker — has a published standard of around 0.025" (0.63 mm), printed on Oregon's filing charts. Every sharpening makes the cutters shorter, shrinking this setting, so check the rakers every time you sharpen.
Hold the file level for standard crosscut chains. Some specialist ripping chains call for a downward tilt of around 10° — another reason the packaging check matters.
How to Sharpen a Chainsaw: Step-by-Step Filing Sequence
Set aside 15–20 minutes for your first go — after that, a touch-up takes under ten. Here's the sequence:
Step 1 — Clean and inspect. Brush the chain clean of sawdust, sap, and oil so you can see the cutter edges. Look for cracked, missing, or heavily damaged teeth — a chain with serious damage belongs at a dealer or in the bin, not under your file.
Step 2 — Secure and tension the saw. Clamp the bar in the vice with the chain brake released so the chain can rotate. Tension the chain a touch firmer than normal.
Step 3 — Mark your starting tooth. Put a felt-tip mark on one cutter as your reference point. If one tooth is visibly more damaged, mark that one: file it back to a clean edge first and use it as the master tooth.
Step 4 — Seat the file and guide. Fit the correctly sized round file into your file guide. Place the file in the cutter's curve with roughly a quarter of the file's diameter above the top of the cutter, and set the guide to the specified angle (usually around 30°) relative to the bar.
Step 5 — File the first tooth. Push the file forward, away from the saw, with smooth, steady, even pressure — only on the forward stroke. Lift the file on the backstroke; a chain file only cuts going forward, and dragging it backwards dulls the file itself. Keep the file level and resist any rocking motion.
Step 6 — Work the same side. Chainsaws alternate left- and right-facing cutters. File every second tooth — all cutters facing the same direction — advancing the chain along the bar as you go. Rotate the file occasionally to spread wear.
Step 7 — Flip and do the other side. Once every cutter on the first side is done, turn the saw 180° and repeat for the cutters facing the other direction.
Step 8 — Check your edge. If light reflects off the cutting edge, it isn't sharp yet — a properly sharpened edge is uniformly bright. If the felt-tip mark is still patchy after a few strokes, the file is sitting too high or too low.
Step 9 — Adjust the depth gauges. Lay the depth-gauge tool over the chain. Any raker sitting proud of the tool gets filed flat until flush. Don't touch the freshly sharpened cutter with the flat file.
Step 10 — Clear burrs and finish. Draw each cutter across hardwood to knock off file burr, wipe the chain down, restore normal chain tension, re-engage the chain brake, and replace the bar cover.
The secret to how to sharpen a chainsaw well is consistency, not muscle. Light, identical strokes on every tooth beat aggressive filing on a few.
How Many Strokes Per Tooth? Keeping Cutters Even
For a routine touch-up, two to four firm strokes per tooth is usually enough. For a chain that's hit dirt or a nail, count the strokes it takes on your worst (master) tooth — then give every other tooth the same number.
Counting strokes keeps all cutters the same length. Uneven cutters make the saw cut crooked and raise kickback risk. If one row of teeth ends up shorter, fix it with one or two extra strokes on the longer teeth.
Testing the Cut
Test the chain with a real cut:
- The chain should pull itself into the timber with almost no downward pressure.
- It should throw off coarse, chunky chips, not fine powder.
- The cut should be straight, with no drifting to one side.
- There should be no smoke and no chattering.
If the saw pulls to one side, one row of cutters is longer — file the long side back to match. If it still won't bite, recheck the rakers: too low and the chain grabs and chatters; too high and a freshly sharpened chain feels dull.
When to Replace the Chain Instead of Sharpening
Filing is maintenance, not resurrection. Replace the chain when:
- The cutters are filed back to the wear mark stamped on them. STIHL's guidance is explicit: if the wear marking is reached, replace the saw chain.
- Teeth are cracked, bent, or missing, or tie straps and drive links are damaged. File the cutters only — never file damaged links.
- The chain keeps stretching despite correct tensioning, or no longer seats on the bar and sprocket.
- The damage from rocks, metal, or dirt is deeper than a few strokes can fix economically.
A fresh chain is cheaper than a damaged bar, a burnt-out engine, or a hospital visit.
How Often Should You Sharpen a Chainsaw? Maintenance Cadence
Don't wait until the chain is completely blunt. A practical cadence for Australian owners:
- During a cutting session: a few file strokes every time you refuel (petrol) or swap batteries (cordless). Two minutes, keeps the edge keen.
- After dirty work: if the chain has touched dirt or hit a nail, touch it up immediately.
- Baseline: a few strokes every few hours of cutting. Cutting firewood all weekend? Expect at least one touch-up during the day.
- Every sharpening: check the depth gauges, clean the bar groove and oil holes, and confirm chain tension.
- Before storage: sharpen, oil the chain lightly, and store with the bar cover on.
Light, frequent filing also extends chain life. Our chainsaw maintenance guide covers the rest: bar care, air filters, chain oil, and seasonal storage.
Frequently Asked Questions
How do I know what size file my chainsaw needs?
Check the pitch of your chain — it's usually stamped on the depth gauge, listed in your saw's owner's manual, or printed on the chain's original packaging. Match the file diameter to the pitch using your chain manufacturer's conversion table (STIHL's published table pairs .325" pitch with a 4.8 mm file and 3/8" pitch with a 5.2 mm file). Never guess: the wrong file size ruins the cutter profile. See STIHL's official sharpening guide for the full table and depth-gauge instructions.
Can I sharpen a chainsaw chain while it's on the bar?
Yes — that's the normal way. Clamp the bar in a vice, release the chain brake so the chain moves, tension it slightly tighter than usual, and file each tooth in place. It's faster and more accurate than removing the chain.
How many times can you sharpen a chainsaw chain?
There's no fixed number — it depends on how much metal each sharpening removes. Light touch-ups of two or three strokes allow dozens of sharpenings; repairing heavy damage can eat a chain's life in a handful of sessions. The hard stop is the wear mark on the cutters.
Should I file in both directions?
No. A round saw-chain file cuts on the forward stroke only. Push forward with steady pressure, then lift the file off the tooth for the return. Dragging it backwards dulls the file and rounds the edge you're creating.
Is it cheaper to sharpen chains myself or have a dealer do it?
Doing it yourself wins on convenience: a quality round file and guide cost very little, and a touch-up takes minutes — no drive to the dealer, no waiting. A dealer sharpening is worth it for a badly damaged chain, since a pro resets every tooth to a uniform profile.